Block Puzzle — Base Game Logic
In the previous article on the Block Puzzle game, I showed how I intended to separate the game logic from its UI. The goal behind this separation is to make it easier to develop and test the game logic without having to do it manually via the UI. In this article, I will show how I am doing the unit tests without writing any UI or even having any dependency on UI code. Although the work was done in small steps, in this article I will explain the reasoning behind them in the hope that I can explain my reasoning behind doing it the way I did it.
Hiding Implementation Details
One thing to always keep in mind when doing Unit Tests is to always keep implementation details hidden. The Unit Tests should verify the behavior and outputs of what is being tested without peeking into its interior. Many times, this is easier said than done, but in our case, it is relatively simple.
My base idea is to have a Game class that would hide all the details of the control of the game and of the state of the game board, if you will. This class will receive the initial state of the board (to make my life easier when doing unit tests) and a provider of game pieces. The board will accept several inputs, but for now we have one for the timer of the simulation (the method tick()) and movement methods (moveLeft, moveRight and rotatePiece). The game will provide the board’s dimensions (colCount and rowCount) and its state (getState()). I will need to extend this interface in the future, but for now. it is sufficient to get a basic game where completed lines are not removed. This should enable a first step in building the UI. I prefer to do a little backend and a little frontend, this allows me to inform my model of what my UI needs.
Making Tests Simple To Write
To make the tests simple to write, I decided to rely on strings. When we don’t care about what is done internally, as long as the result is what we expect, using strings can be an easy way to write tests. I can even leverage this later in the UI to have different letters represent different colors without polluting my model with color information.
The process I use is simple: I represent the board as a list of strings, each string representing a row in the game.
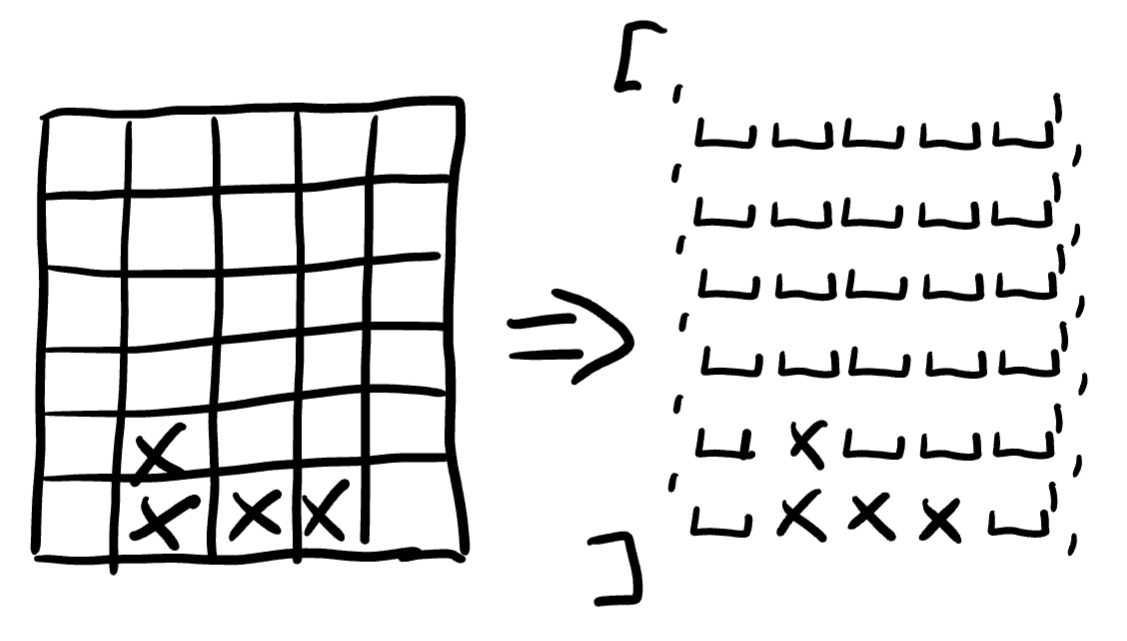
How a matrix that represents the board of the game can be turned into an array of strings
How a matrix that represents the board of the game can be turned into an array of strings
This simple solution means I can write tests visually, making my life that much simpler. It has the cost of making me work with strings, but I believe the price is worth paying.
Here is a small example taken from the unit tests:
  test('Piece moves down when time ticks', () {
    var game = buildGame([
      ' ',
      ' ',
    ]);

    game.tick();

    expect(game.getState(), equals(State.running));
    verifyGameState(game, [
      ' ',
      'P',
    ]);
  });
The game is a simple column board, and by default, the pieces used in the tests are a single box. The game will start with the piece at the top, provided by the first tick() when the game starts. When the second tick() occurs, called by the test, the piece will be in the bottom line. Here is the same sequence as a diagram to better understand it.
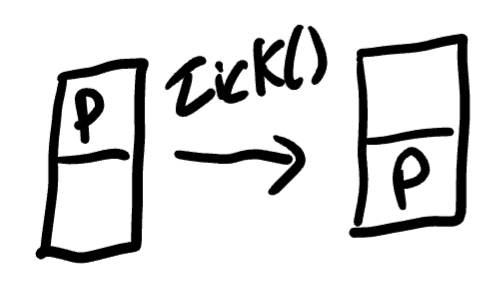
How the timer makes the piece move
This was the first abstraction that enable me to write the unit tests in small increments. The first step is always the degenerate tests (boards with no columns or rows or where the sizes don’t match).
Rotating Pieces
To rotate the pieces I could have gone for something more complex, but I leveraged strings once more. I defined that each piece could have one or more sprites, borrowing the sprite name from the gaming world. That way, rotating a piece would mean having to select the next sprite: plain and simple.
This second abstraction means my game can support any type of piece, as long as I provide with a sequence of sprites.
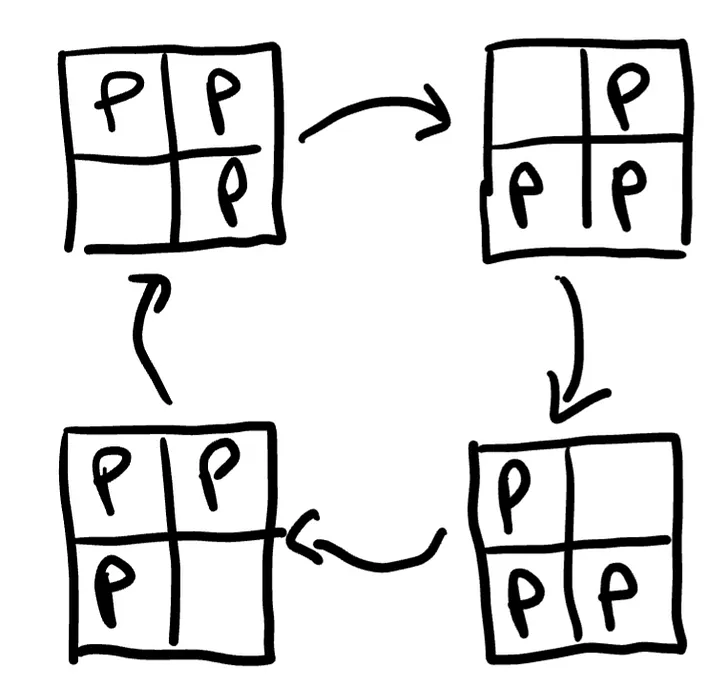
Sprites form an infinite cycle of rotation for the pieces
Next Step
The next step will be to build the base UI for the game so that it is actually playable. We have one big game logic missing still: detecting complete lines and removing them, but I believe the current state warrants the start of the UI. It will be a good opportunity to check if there is something missing in the game abstraction.
You can check the project’s code on GitHub. I have also applied a tag with the state of the project at the time I wrote this article. Stay tuned if you want to get further updates.
Articles in the series: